 Takeaway:
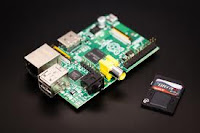
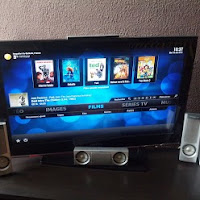
This is my first article regarding the use of the Raspberry Pi here at "The Nerdbench". In this article I will review what is needed to transform the Raspberry Pi into a robust Media Center that is very capable of offering a variety of content with minimal configuration (my basic configuration tool less than 30 minutes). This article will provide a general overview of the tasks required to install RaspBMC to a Raspberry Pi using a Windows-based OS.
There are a number of features that one can configure within RaspBMC such as configurable local weather forecasts and easy access to centrally stored files (which can be stored on a variety network based locations such as a NAS or Windows-based server). Additionally there are a number of streaming options that can be configured for audio and video uses.
Hardware Items:
- Raspberry Pi*
- 4GB SD Memory Card (used to store the OS and media; user larger media if needed) *
- HDMI Cable (used to connect the Raspberry Pi to the monitor using HDMI) *
- Memory Card reader for SD Memory Card*
- 1 Amp (1000mA) USB-based Power Supply*
- USB 2.0 Powered Hub (required if you intend to add a USB-based Storage)
* are required items
Software Items:
- The process listed in this article will required the use of a Windows-based OS
- WinRAR (free tool used to expand the .gz file to a img file)
- Win32DiskImager (free tool used to extract img file to the SD Memory Card)
Overview:
- Insert the SD Memory Card into your computer's memory card reader
- Record the drive letter assigned to the SD Memory Card (required for Step-7)
- From a computer download the Standalone Image to a location on the hard disk
- Download and install WinRAR to your computer
- Download and install Win32DiskImager to your computer
- Use WinRAR to extract the .GZ file to a location on your hard disk
- Use Win32DiskImager to extract the .IMG file to your SD Memory Card (use drive letter from Step-2)
- Use Windows's Explorer to verify that files have been written to the SD Memory Card
- Eject the SD Memory Card from your computer
- Verify that your Raspberry Pi's is powered down
- Insert the SD Memory Card into the Raspberry Pi's memory card slot
- Install the Ethernet Cable, HDMI Cable, USB Mouse, and USB into correct ports on the Pi
- Power up the Raspberry Pi
 At this point you should see the Raspberry Pi boot; eventually the RaspBMC main screen will be displayed.
What is next:In the next article I will cover basic configuration regarding how to configure the RaspBMC to use media stored on a Windows Server Share or media stored on a external USB Hard Drive.
Have fun!

No comments:
Post a Comment